
Use the Whiteboard during a lesson
The Whiteboard is the heart of every Class Spot lesson. You write, draw, and work alongside your student — in real time, in the browser, with no installs. This article is the high-level overview: where to find a board, what’s on the toolbar, and how a board behaves between lessons. The deeper topics (adding materials, screen sharing, action control, downloads) each have their own article — see the Related section at the bottom as those go live.
Three kinds of boards
It’s worth knowing which board you’re on, because each behaves differently:
| Where the board lives | Persistence | When to use |
|---|---|---|
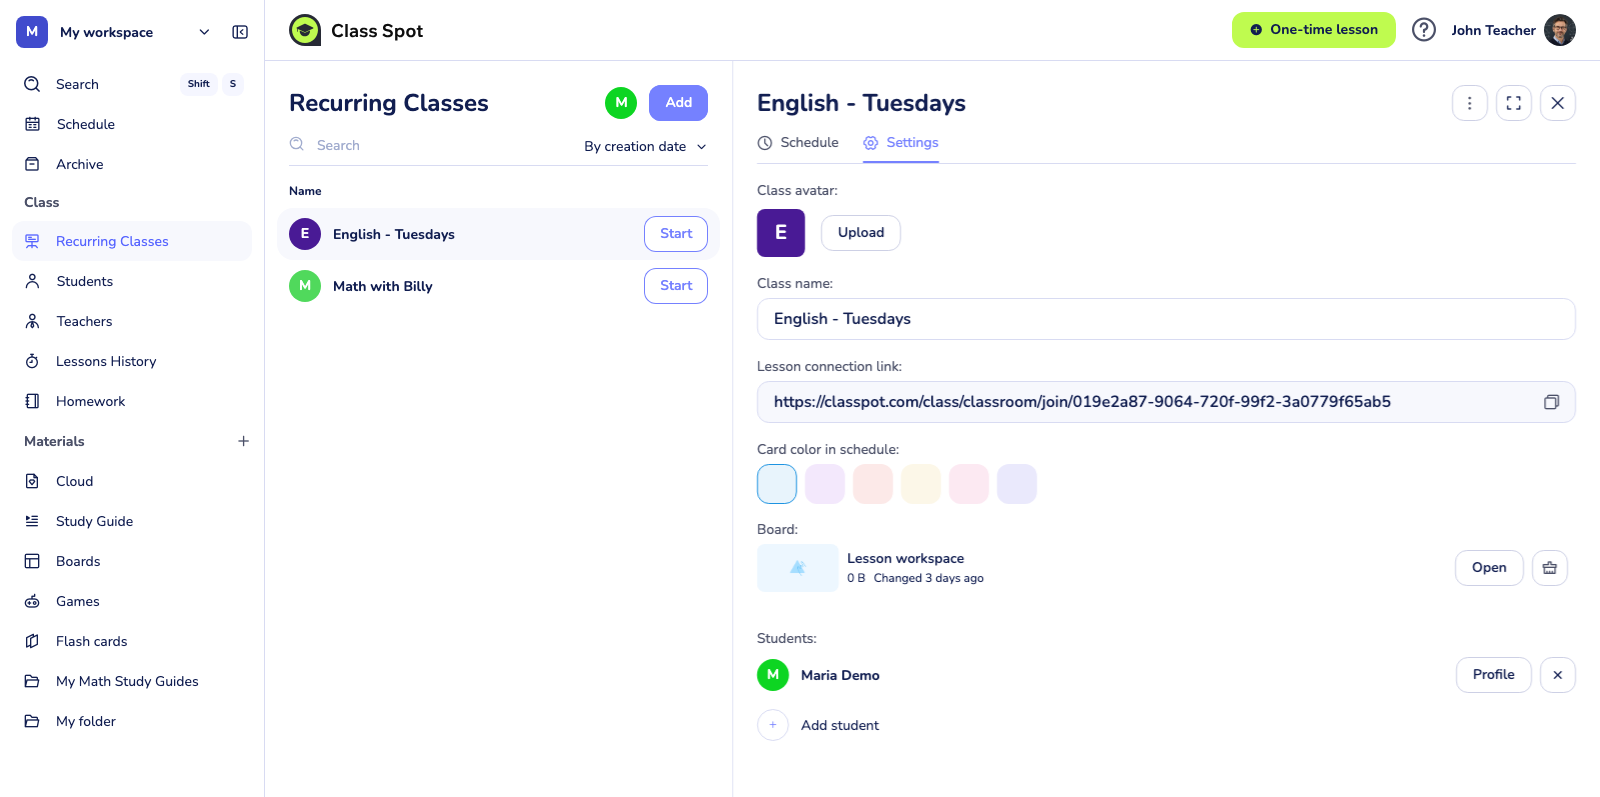
Recurring Class (Recurring Classes → [your class] → Settings → Board) |
Permanent — same board across every lesson of this class. | Ongoing students, weekly sessions, anything you want to come back to. |
| One-time lesson (top-right header One-time lesson button) | Ephemeral — blank board each click, no persistence after the lesson. | Trial lessons, prospects, single-session interviews. |
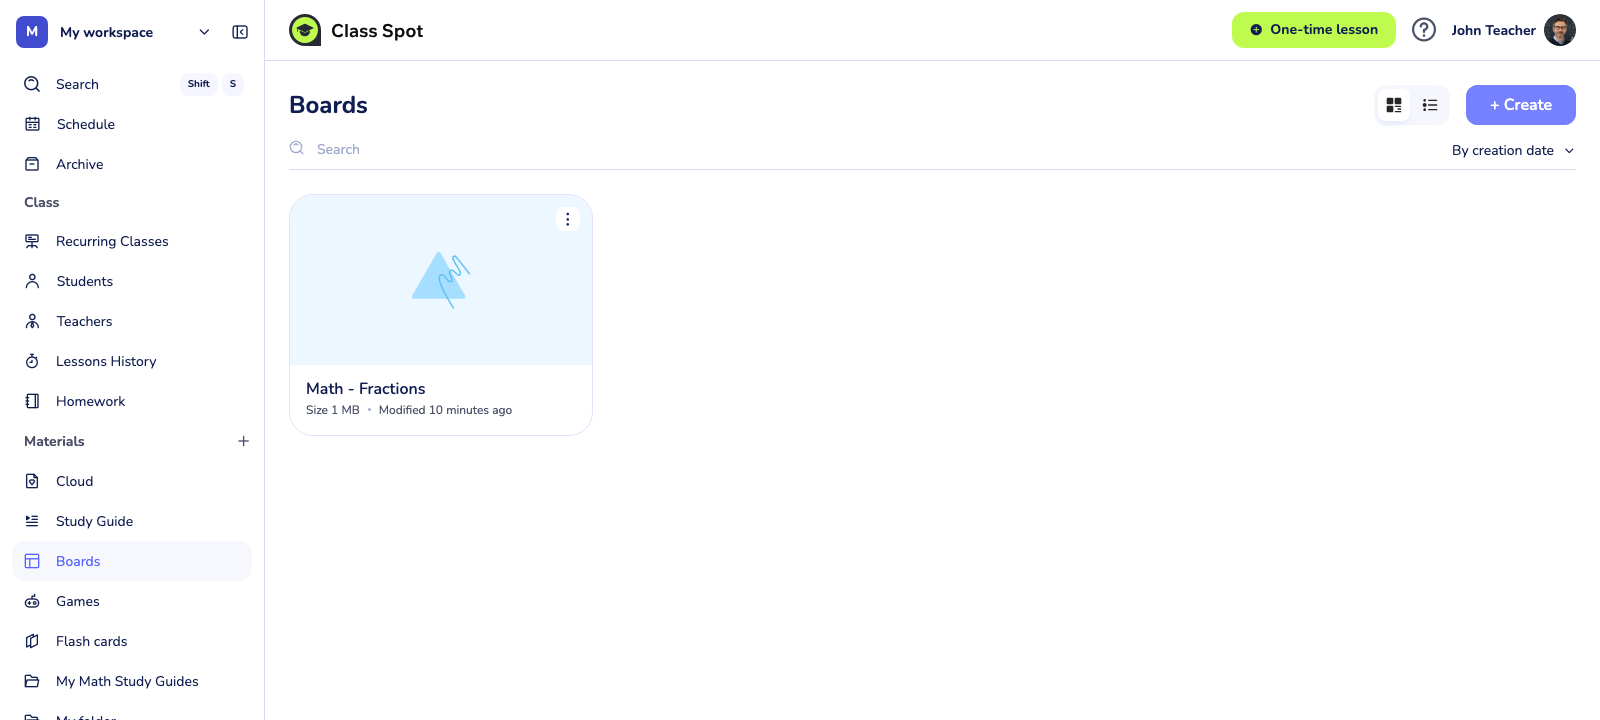
Board preset (Materials → Boards → + Board) |
Saved as a reusable template you can load into any lesson. | Pre-built exercises, lesson plans you reuse with different students. |
If you find yourself rebuilding the same activity for every student, save it as a preset under Materials and load it instead.
Where each one lives in the cabinet:
Recurring Class — Settings tab → Board section. Open the class, switch to Settings, scroll to Board. Click Open to enter the board, or the lesson auto-loads it when you click Start.
One-time lesson — top-right header. The green One-time lesson button is in the page header, available from any screen in the cabinet.

Board preset — Materials → Boards. All your saved presets live here. Click + Create to make a new one, or open an existing preset to edit it.
The toolbar — what each tool does
Open any lesson and you’ll see the toolbar as a vertical strip along the left edge of the board. From top to bottom, it holds ten tools:
Drawing and writing
- Cursor (hotkey V). Select, move, and resize anything on the board. This is the default tool.
- Materials. Opens the Library picker — a modal where you pull in your saved Study Guides, Boards, Games, and Flash Cards (more on this below).
- Pencil (hotkey P). The most-used drawing tool. It opens a brush menu — Pencil, Marker, Highlighter, and Eraser — and you can set line thickness and color. Good for formulas, free-form notes, and corrections.
- Shapes (hotkey S). A flyout of six quick shapes (square, rounded rectangle, triangle, circle, line, arrow), plus All shapes for the full palette — Basic Figures, Stereometry, and Geometry, with a search box.
- Text (hotkey T). Add typed text blocks for definitions, titles, and prompts you don’t want to draw by hand.
- Sticker (hotkey N). Drop a sticky note on the board and pick its color from the swatch picker.
- Decals. Insert decorative emblems, grouped under “Emotions and reactions” and “Actions and gestures”.
- Math. Opens two tools for maths lessons — Formula, for typeset maths you enter in LaTeX (with an on-screen math keyboard), and Graph, for plotting a function on a coordinate plane. Both are free on every plan.
- Frame. Wrap part of the board in a frame to group and organize content.
- Upload file. Add a file from your computer or from your Cloud (see below).
Navigation, undo, and zoom — the bottom-right cluster
A separate control cluster sits in the bottom-right corner of the board:
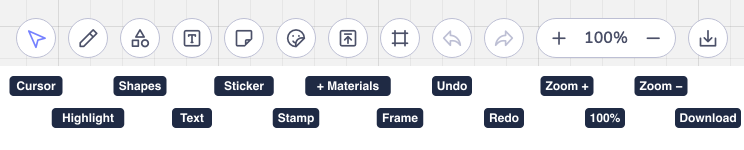
- Undo and Redo. Roll your last actions back and forward. (In the current interface the tooltips read “Cancel” and “Return”; this wording is being corrected.)
- Pan (the hand tool). Click and drag the board to move around the canvas.
- Zoom in / Zoom out with a percentage readout in the middle. Zoom in for detail work or out to see the full board — the canvas is large, so you can plan several lessons’ worth of content on one board and use only part of it per lesson.
Adding materials and files
- Materials (left toolbar). Opens the Library picker overlay. Search by name, browse Library (Study Guides, Boards, Games, Flash Cards) or My folders, and pull a saved item onto the board.
- Upload file (left toolbar). Choose From computer or From cloud. You can add images, PDFs, Microsoft PowerPoint files (
.ppt/.pptx), and audio. The exact allowed file types and size limits are set on the server and can vary per board.
What else lives in the lesson room
A few more capabilities live in the lesson room — each gets its own article so we can cover them properly:
- Restrict student actions — give a student editor or reader rights, or hide the tools entirely. Article coming soon.
- Share your screen. See Share your screen in a lesson.
- Save the board as a preset or export it as a PDF. Article coming soon.
- Clear the board. The burger menu on the board header holds Clear board — it wipes all content for everyone in the room after a confirmation, including anything you’d locked. Undo brings it back.
How the board behaves between lessons
This trips people up, so it’s worth being explicit:
- Recurring Class board: everything you draw or upload stays. Open the class next week and your notes are still there. Use this as a running notebook for the student.
- One-time lesson board: the moment you close the room, the board is gone. Don’t put anything on a One-time board you wanted to keep — save it as a preset before you leave.
- Board preset: changes you make to a preset during a lesson don’t overwrite the original by default. You’ll be asked whether to save the changes back to the preset or keep them only for this lesson.
Plan limits at a glance
| Capability | Free | Solo Pro | Solo Max | Business |
|---|---|---|---|---|
| Whiteboard tools | ✓ | ✓ | ✓ | ✓ |
| Screen sharing | ✓ | ✓ | ✓ | ✓ |
| Number of saved boards (presets) | up to 3 | unlimited | unlimited | unlimited |
| Share Whiteboard with another teacher | ✓ | ✓ | ✓ | ✓ |
| Max lesson length | 40 min | extended | extended | extended |
For the full plan comparison, see Compare Class Spot plans.
Tips
- Plan a few lessons on one board. The board canvas is wide. Lay out three or four lessons side by side, then use the zoom and pan to walk through one at a time. Easier than rebuilding every week.
- Use color for feedback. Write your student’s answers in their own color, then mark corrections in red. Visual continuity helps memory.
- Don’t fight the wrong board. If you opened a One-time lesson and started working, your notes won’t be there next week. Save them as a preset, or switch to a Recurring Class so the board persists.
Troubleshooting
The board feels slow or stutters.
- Refresh the page once (Ctrl/Cmd + R). Brings the board state into a clean local cache.
- Check your internet speed — the Whiteboard syncs continuously, so it’s sensitive to packet loss. We recommend 5 Mbps down / 2 Mbps up minimum.
- Remove large, unused files from the board. A 50 MB PDF that nobody is annotating slows the whole canvas.
Something I drew has disappeared.
- The student or co-teacher may have used the eraser or Undo. Press Redo to recover the last action.
- Make sure you’re on the same board view (zoom and pan state are per-user; the content is shared).
The student can’t see what I’m doing.
- The board is shared in real time. If the student sees a blank canvas while you’re writing, ask them to refresh. Persistent gaps usually mean a slow connection on their side — check the audio: if the audio is also stuttering, it’s a network issue.
I want to undo only my last stroke, not the student’s.
- Undo is per-user — your Undo only rolls back actions you made, not the student’s. If your student drew something you’d rather they hadn’t, ask them to undo, or use the eraser on that area.
If nothing above helps
Contact us:
- In-product chat — click the green chat bubble in the bottom-right of your cabinet, then Start Conversation.
- Email — info@classpot.com.